Wednesday, June 15, 2011

Monster Week-Wednesday

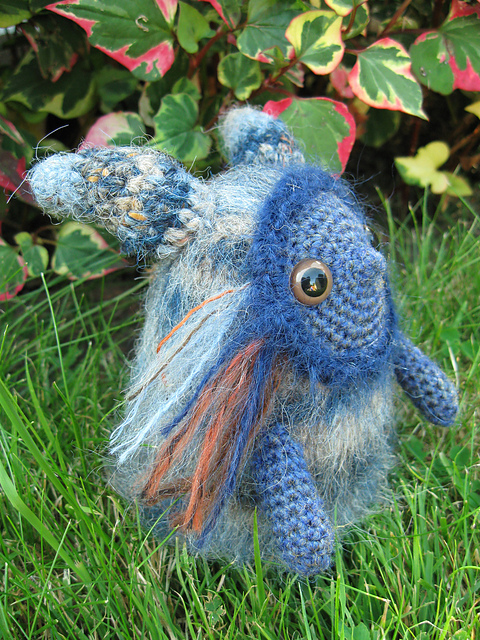
Today on Monster Week we have this lovely, Yetty like, mountain spirit. He's cute and lovable, and has a lot of color options. You can find his Ravelry page and pictures of different color ideas here. This guys is about $4 as he's pretty awesome so I would say it's worth it.
The pattern itself can be purchased here in her etsy shop.
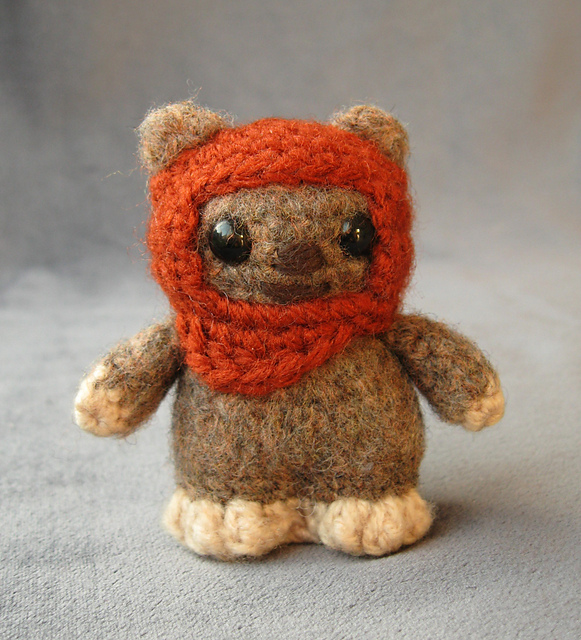
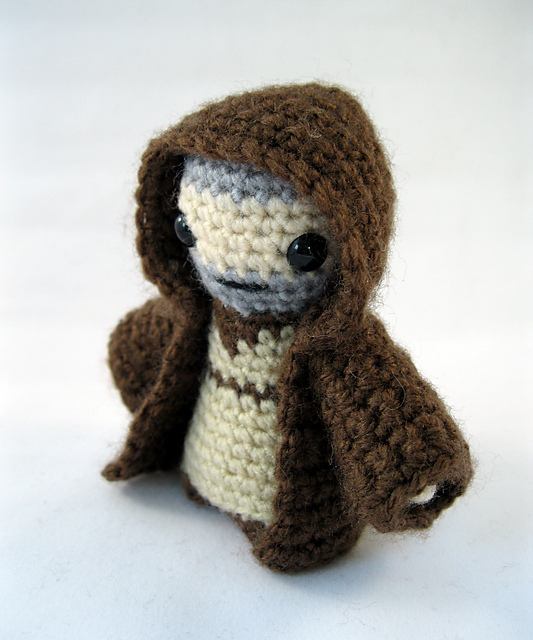
The designer, Lucy Ravenscar, also has quite a few good Star Wars pattern which can be seen here along with her other pattern.


Thanks for checkin' out Wednesday on Monster Week! Hope to see you here tomorrow!

Tuesday, June 14, 2011

June Pattern Requests

Well, it's that time of month again. Pattern request time. The time where you get to send in suggestions for the next pattern I make. Comment all your great ideas and I might pick yours to be the next free pattern you see on my blog.


Rules:
  1. It must be a character from a cartoon, tv show or movie (cartoons are my fav... hint,hint.)
  2. I must be able to find pictures of the character on google
  3. Comment on this post giving your idea
  4. If you see a current comment idea that you like, re-comment it  (popular vote wins) 
  5. If I don't pick your idea re-comment it next month (I'm sure to get to you sometime)
  6. Comments must be posted by June 21 (Let's not repeat last month, with no comments until the last minute)
Let the pattern requests begin!

Monster Week- Tuesday

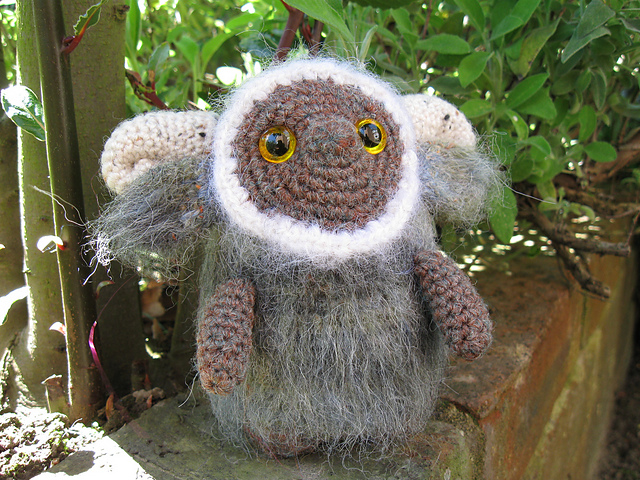
Today we have another creature who, depending on who you are, could or could not be a classified as a monster. Some might think this little guy is to cute to be called a monster and say he should really be called a creature. Well I say same difference. He's to awesome not to be featured this week.

His name is Chi-Kore and his pattern costs about 5$, but it's totally worth it I say. I mean, look at this little guy! He's the picture of cuteness. I have to commend the designer for her good choices of color. I think the thing works really well.
The pattern, as previously stated, is about $5 and has very clear instructions along with 15 helpful photos. His ravelry page and also where you can purchase his pattern is here.
I hope you've enjoyed today's Monster post, and I'll see you back here tomorrow for more monster mischief.

Monday, June 13, 2011

Monster Week!!

I officially declare this week Monster Week!! And everyday this week I'll take you through some of of the cutest monster patterns out there and even make a few of my own. So strap on your seat belt and put on your favorite monster disguise as we jump into the cute, cuddly, and scary world of monsters.

First off this week, we have a couple of adorable (free) patterns made by A[mi]dorable Crochet-

This little Frankenstien girl is probably one of the cutest things I've seen on ravelry. She is so cute! You can find her ravelry page here, and the actual pattern blog page here. I haven't made her yet but I totally intend to when I find the time.


And what says cute and creepy like a Franken Bunny? I don't know what this girl's obsession with Frankenstien is, but it sure does translate into a lot of cute creatures! You can find the pattern blog page for this creepy cute little thing here.

And that's it for Monster Week Monday! Hope to see you back here tomorrow for some more creepy cute fun!

Thursday, June 9, 2011

Pattern: Yogi Bear

Yogi Bear. Yet another adorable cartoon made during the golden age of cartoons that people can't seem to get enough of. I love Yogi, so I was extremely shocked not to find a single pattern for him anywhere. So being the designer that I am, I made one. And as always it's here for all of you to use for free.

Notions: G hook
               F hook
               Light Brown and Tan and light Green yarn
               Small amount of Black yarn
               Black and White felt
               Tapestry needle
               Stitch marker
               Fiber fill (I always forget to put that on the list)
               Hot glue gun

Body: With LB yarn and G hook, ch 2, sc 6 in second ch from hook.
Rnd 1: Inc around
Rnd 2: Sc, inc, round
Rnd 3: Sc 2, inc, around
Rnds 4-9: Sc around
Rnd 10: Sc 3, inc, around
Rnds 11-13: Sc around
Rnd 14: Sc 4, inc, around
Rnds 15-19: Sc around
Rnd 20: Sc 5, inc, around
Rnd 21: Sc 4, dec, around
Rnd 22: Sc 3, dec, around
Rnd 23: Sc 2, dec, around
Rnd 24: Sc, dec, around
Stuff.
Rnd 25: dec around
Fasten off and sew hole closed.    

Nose: With black yarn and F hook, ch 2, sc 6 in second ch from hook.
Rnd 1: Sc around
Rnd 2: Inc around
Switch to tan yarn
Rnd 3: Inc in next 3 sts, sc in rest
Rnd 4: ( Sc, inc) 3 times. sc in rest
Rnd 5: Sc around
Rnd 6: Sc, dc inc, dc 2, sc, sl st 3, sc, dc 2, dc inc, sc, sl st 5.
Fasten off and lightly stuff. Sew unto front of head.

Legs: (Make 2) With LB and G hook, ch 2, sc 5 in second ch from hook.
Rnds 1-5: Sc around
Rnd 6: Inc around
Rnds 7&8: Sc around
Row 9: Sc, ch 1 and turn. Sc 4 across.
Rows 10&11: ch 1, sc across. Fasten off and sew to body.

Now you should have something that looks like this (Lower right) .
If you fold the long skinny part to the left, like the left picture, and sew it in that position you'll have the left leg. Fold it to the right and you'll have the right leg. The tab at the top helps make the leg flow naturally into the body when to sew it.


Arms: (Make 2) With LB yarn and G hook, ch, sc 5 in second ch from hook
Rnds 1-5: Sc around
Rnd 6: Sc, inc around. Sc in last
Rnds 7-11: Sc around
Row 12: Sc 4, ch 1 and turn
Row 13: Sc 4 across.
Fasten off and sew to body

Ears: (Make 2) With LB and G hook
Ch 2, sc, dc 2, sc in second ch from hook. Fasten off and sew to head.

Hat: With LG and G hook, ch 2, sc 6 in second ch from hook
Rnd 1: Inc around
Rnd 2: Sc, inc, around
Rnd 3: Sc 2, inc, around
Rnd 4: (in back loops only) sc around
Rnd 5: Sc around
Rnd 6: (in front loops only) [sc, hdc, dc inc, dc 3 in next st, dc, dc inc, hdc, sc, sl st 3] repeat
Fasten off. Cut out and glue a strip of black felt to the hat.

Collar & Tie: For the tie, (make 2) ch 7 and sl st in second ch from hook and rest. Fasten off. Glue together and then glue to Yogi. The collar is simply a white piece of felt glued to Yogi and over top the tie. I liked the felt because it looks really clean.

Eyes and Mouth: There're felt. I'm sure you can figure out the rest.

And there you have it. Yogi Bear. Don't forget to contact me if you have any problems with the pattern or any questions. Have fun at JellyStone Park!
Monday, June 6, 2011

(Belated) May pattern: Teal'c

Well, it finally made it. The May pattern is here. Because some people wouldn't put in any requests, pattern requests almost went down the drain. But thankfully I was saved at the last minute and worked really hard to get this pattern done, it's a little late but no biggie.
Now, this is a character from Stargate and, sadly, I've never seen Stargate. My parents are strict about tv and Stargate is one of those things that's still off limits. I'm stuck watching older classics like Star Trek and Macgyver, but that's ok because I like that kind of thing. Anyway, because of never having seen Stargate I apologize for any sloppiness or any details that aren't correct.
Now, you'll see this style of amigurumi quite a lot. Some of the most notable are Geek Central Station and Creepy Cute Crochet. It's not my favorite or my forte but it works well for humans. Let's get to the pattern!


Notions
G Hook
Light Brown yarn
Black yarn
Clay (optional)
Stitch marker
Tapestry needle
Glue gun


BODY:
With Light brown , work 2 ch

Rnd 1: 6 sc in 2nd ch from hook
Rnd 2: Inc around
Rdn 3: (sc in next st, sc in next st) 

Rnd 4: (sc in next st, inc in next st) 
Rnd 5: Sc around
Rnd 6: (sc in next 3 st, inc in next st) 
Rnd 7: (sc in next 4 st, inc in next st) 
Rnd 8: Sc around
Rnd 9 (sc in next 5 st, inc in next st) 
Rnd 10-14: Sc around
Rnd 15: (sc in next 7 st, dec)

Rnd 16-17: (sc in next 6 st, dec)
Rnd 18: Sc around
Rnd 19: (sc in next 5st, dec) 
Rnd 20: (sc in next 4 st, dec) 
Rnd 21: Sc around
Rnd 22: (sc in next 3 st, dec) 
Now is a good time to put in the arms


ARMS: Make two 
With SC, ch 2

Rnd 1: 5 sc in 2nd ch from hook
Rnd 2: (sc in next st, 2 sc in next st) 
Rnd 3-8: Sc around
leave a long yarn tail to attach arm to body

Attach these to the body and pick up the stitch on the stitch holder with the skin color to finish the head.

HEAD: With SC
Rnd 23: (sc in next 2 st, 2 sc in next st) 
Rnd 24: (sc in next 3 st, 2 sc in next st) 
Rnd 25: (sc in next 4 st, 2 sc in next st) 
Rnd 26: (sc in next 5 st, 2 sc in next st) 
Rnd 27-29: Sc around
Rnd 30: (sc in next 4 st, dec) 
If you have safety eyes, now would be a good time to put them in--try to place them around row 22
Rnd 31: (sc in next 3 st, dec) 
Rnd 32: (sc in next 2 st, dec) 
Now is when you want to stuff the whole body, and even put a weight down at the bottom if you are so inclined. Make sure you stuff the body very tightly.
Rnd 33: (sc in next 1 st, dec) until end of row or until the head is completely closed up.
Weave in all ends.


I made his armor out of clay but I know a lot of people don't really know what to do with it, so I made crochet armor too. It's not quite as cool but it's ok. This is what it looks like:


With silver yarn, Ch 35
Sc in first ch making a loop
Rnd 1-2: Sc around
Rnd 3: (sc 3, dec)
Rnd 4: {in front loop of st only} (sc 2, hdc 2, dc 2, dc inc, dc 3 in next st, dc inc, dc 2, hdc 2, sc 2) Repeat twice
Rnd 5: Sc around but sl st in any previous sc
Fasten off. This is the top breast plate thingy.


With silver, ch 7
Row 1-5: sc across, ch 1
Fasten off. This is the middle breast plate thingy.


With Silver, ch 32
Sc in first ch making a loop. 
Rnd 1: Sc 14, ch 4, skip last ch and sc in rest, skip 1 sc, sc in reast.
Fasten off. This makes the belt


With Silver, ch 2
Sc 5 into second ch, inc around
Fasten off. This makes the shoulder plates. Make two


And there ya have it. Simply sew the armor pieces to the body and make the face out of felt,beads, whatever. As always you guys are my best editors so let me know if you see a problem. Hope you enjoyed this. :)

Friday, June 3, 2011

On My Way

Hey everyone, I just wanted to post a little note to let you all know that I know it's been a little while since my last post but I have a couple of great patterns coming up. One of which is the May Pattern Request pattern. The whole pattern request idea almost fell through the roof with no comment ideas from anyone but luckily I was saved by one of my new followers Lisa, who just sent in a great last minute idea yesterday. I'm currently hard at work on that idea and also a pattern that I think you'll all love. They should be up in the next week or so, so stick around! Hope